
Related Articles:
Table Of Contents:
Sample Screen Layout
Note: If you are not assigned Administrator or Legacy Manager permissions and/or do not have a Data license you will have limited access within the portal . Admins and Legacy Managers with a Data license will have access to all of the menu items included in this article. To learn more about permissions click here.
When you first log into the OnStation Portal, on the Left-hand upper corner you will see your own name and email address. If you click on your name you can edit your own user account settings.
See demonstration in the video below:
You will also see a panel on the left- hand side and that you are defaulted to the Team menu. You will see a total license count in the far right hand side showing how many licenses are assigned vs total owned. You will also see a button option to "Request New Quote"
Request New Quote 
The Request New Quote menu link will take you directly to our package offers and pricing page.
Here you can learn more about what OnStation offers, request a custom quote, and view our FAQ page.
You can also reach out to our sales team or request a call via our "Contact Us" page.
Left Hand Panel Info, Features and Menus
Starting at the top of the left hand panel you will see your Full User Name, Organization name, and email address associated to your account. Following that you will see the menus for each item that you can Manage.
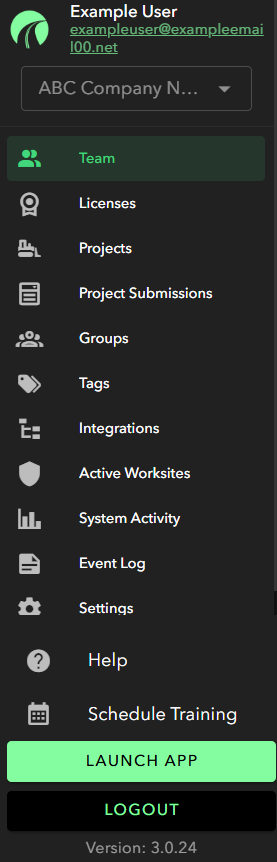
Team
The Team menu allows you to view your team, view pending requests, edit/add/remove user accounts, add/remove/edit licenses, and edit group assignments for your Organization. Additionally, note that each column can be sorted in ascending and descending order. View Demo below.
To learn more about the tools available in this menu see the following articles:
- Adding Users
- Adding /Remove Managers
- Editing User Accounts via Portal
- View/Adjust User's License Status
- Create User Permission Groups
Licenses
The Licenses menu will allow you to see current and previous licenses with status, assigned vs total summary, date of purchase, renewed, and expiration dates. All colums can be sorted.
Sample Licensing Menu (some info redacted under License ID)

To learn more about licensing see the following article: License Menu. To see more about our pricing and package offers, see our Pricing Page. You can also reach out to our sales team or request a call via our "Contact Us" page.
Projects
The Projects Menu allows you to see OnStation Projects that have been associated to your organization. These may not necessarily be ones that you company submitted but ones that have been identified as being worked on by your organization. To see more on this menu see article: Add / Remove Projects to Your Organization
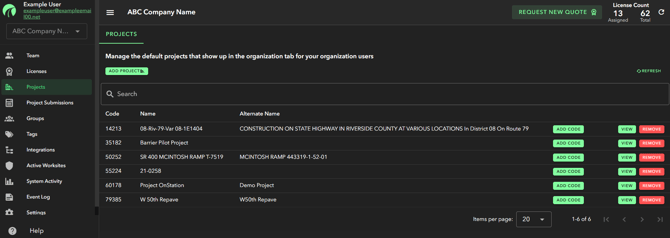
Clicking on the "View" ![]() Menu to the far right of a project will bring you to the Data Portal for that project. To learn more about navigating within the Data Portal see article: Accessing & Navigating within the Data Portal
Menu to the far right of a project will bring you to the Data Portal for that project. To learn more about navigating within the Data Portal see article: Accessing & Navigating within the Data Portal
![]()
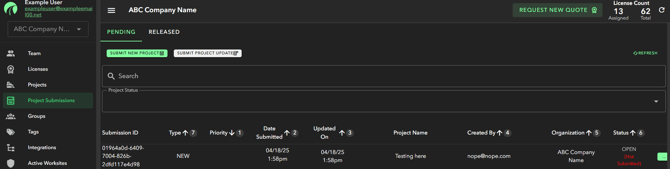
Project Submissions
The Project Submissions menu allows you to submit new or revisions (change orders) for one or more projects. Note you can multi-sort the columns in this menu. To learn more about the tools in this menu see articles How to Submit a New Project and How to Submit a Project Update.
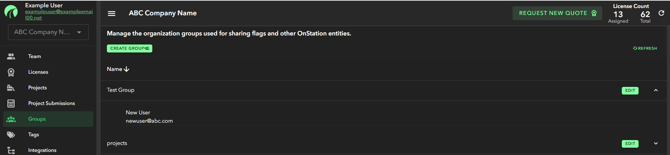
Groups
The Groups menu allows you to create User Groups for your organization. These can be used in the OnStation App by all of your users to share flags, chats, forms, and similar project data in the app. These groups can also be used when using the Project Submission Process to notify persons when projects are ready in OnStation. Additionally these groups can be utilized to customer permission sets for users in your organization. To learn more about user groups to share information see article: Creating User Groups. To learn about creating groups and assigning permissions click here.
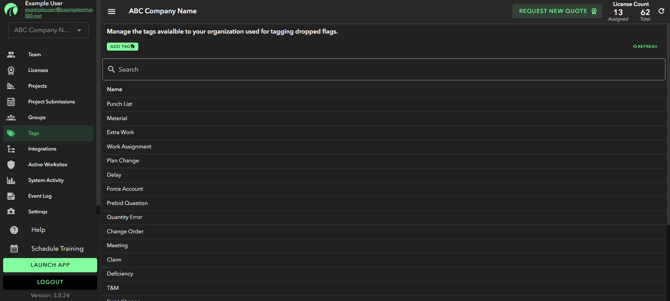
Tags
Using tags allows you to quickly search and find Flag & Chats of a particular type. Examples of tags include Punch List, RFI, Force Account, Test Location, and now endless other possibilities. To learn more about Tags see article: Adding/Removing Tags to Flags
Note: We also have the ability to add your project’s work item list so you can keep your notes and conversations organized per work item. To see more about Work List Items
Integrations
In the integrations menu you can manage the API keys and third party integrations for your Organization, such as TransTech, FleetWatcher, and HeavyJobs. To learn more about Integrations click here.
Active Worksite™
Our Active Worksite™ product enables OnStation to report your location in real time in order to highlight active work zones and the workers within those boundaries. This helps improve team coordination and safety by giving visible indicators of when a job site is actively being worked on and how many people are currently working in that construction zone.
From this menu you can view an interactive map which displays the location where Active Worksite™ is enabled.
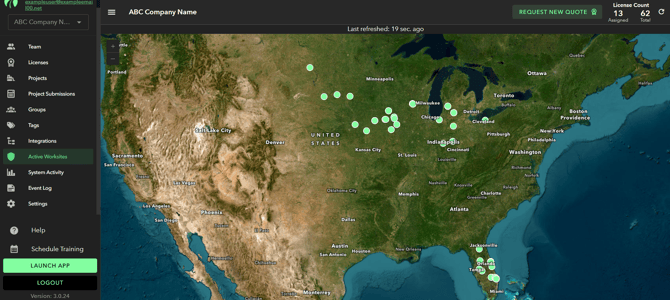
To learn more about Active Worksite™ click here.
System Activity
In the OnStation Portal view your organization's activities across projects to better understand how your team is using OnStation. To learn more click this article: View Your Organization's Activities
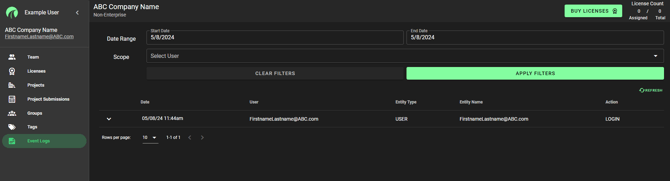
Event Logs
The Event Logs provide the ability for an OnStation Manager to view activity that is occurring for users within their organization. For more information about using the Event Logs see article: Using the Event Logs
Help 
Tapping on this "Help" Menu will bring you to our OnStation Knowledge Base site. Here you can search through a number of articles and topics as well as contact OnStation Support.
Schedule Training 
Tapping this button will take you to a scheduling page where we'll connect you with the right expert on your account.
Launch App 
Clicking the "Launch App" menu will bring you to the OnStation Web App if you are on a desktop/laptop. If you are on a mobile device it will bring you to your OnStation App.
Tip: to learn more about the OnStation Web App see this article: Accessing the OnStation App via Web Browser
Logout 
Clicking on the "Logout" menu will sign you out of the OnStation Portal.
Version 
At the bottom left-hand corner of the screen you will see the OnStation Portal version. As changes are made to the Portal you will see this number change. In the event that you're not seeing something in the Portal working as expected, our Support team may ask you to locate this version number. They may ask you to Logout of the site and close all browsers to clear any cache data that may be preventing you from seeing the latest version.
https://help.onstationapp.com/knowledge/project-update-submissions-process