
Our pay line item enhancement integrates with AASHTOWare
- Flag a feature or location, then attach the appropriate pay line item — creating a direct link between physical construction and the job-specific item.
- Pay line items, contractors, and quantity all come from your organization's AASHTOWare Project (AWP) connection, helping keep what's entered in the field grounded in the contract of record.
One flag. Location, photos, forms, communication, and now, pay line items — all attached and ready to export.
That single flag does a lot of work after the fact. Project engineers and contract administrators use it to verify quantities and prepare pay estimates. Auditors use it to confirm the work on record matches what was paid. Asset managers use it to turn finished construction directly into tracked, maintained assets — no re-surveying, no rebuilding records from scratch.
One flag, tagged once in the field, keeps paying off for everyone downstream.
Check out the information below to learn how to use the pay line item feature.
Requirements
To use this feature, reach out to OnStation support to get started: call or text (216) 503-8554.
- Your organization is using AWP and has the API enabled for pay line items.
- Your organization has pay line items enabled in OnStation, with the API configured to connect to AWP.
- Each project must be mapped from its OnStation Project ID to its corresponding AWP Project ID, for every project using that pay line item list.
- Your organization has a Data license.
How to Use Pay Line Items :
Addition of AWP / PLI to Flag (App)
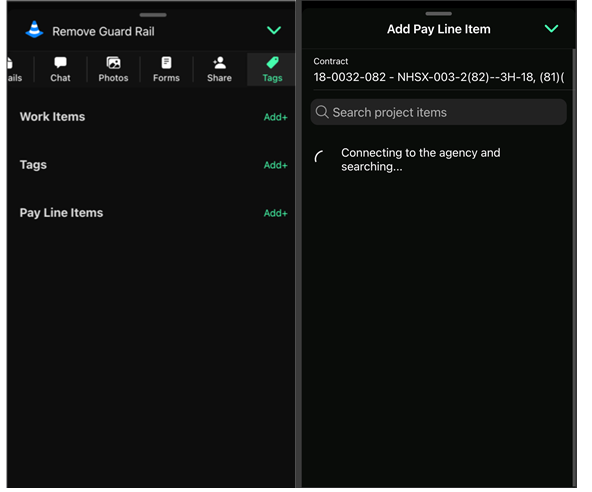
- Go to the flag “Tags” tab and find the Pay Line Items section, Add a pay line item
- If more than one contract is configured for the project, a contract needs to be selected, otherwise it is auto-selected
- Once contract is selected, we connect to AWP to load the contract items
-
Note: this is pulling live from AWP directly. The first pull may be slow but subsequent connects will go faster.
-
-
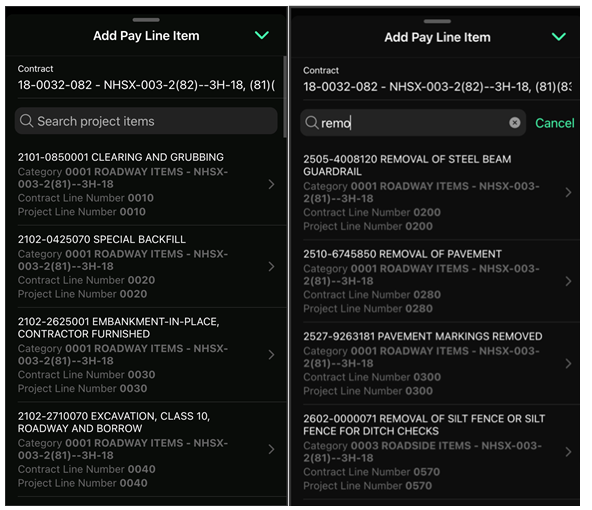
Initially the first page of contract items are loaded, providing an infinite scroll if the user wants to browse the contract items. If the users wants to search / filter for specific items, they can do so by using the search box:
- Once selecting the contract item (in this case, removal of guardrail for the above example), the user is prompted to provide the required information for the work completed as part of the PLI.
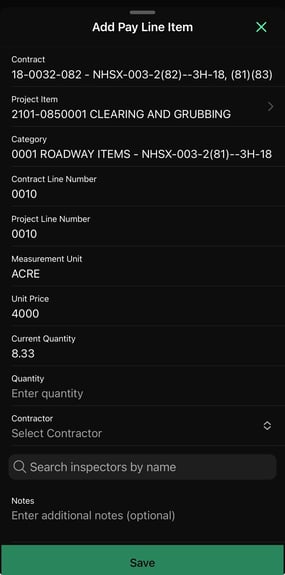
- Quantity
- Contractor (this is required to know which contractor to bill the work to)
- Inspector
- Notes (optional, if there is any additional information needed)
- They will NOT be able to SAVE until Quantity, Contractor, and Inspector are selected
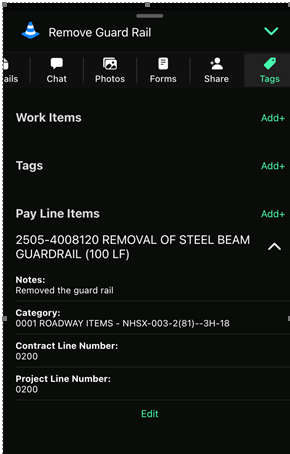
- Once saved the PLI will show on the Tabs page in a collapsed format, expandable for detail view (and exposing the edit button)
- Multiple PLI items can be added. These can be removed as well.
- To learn more about creating / sharing flags see article: Creating Flags
PLI in Portal
-
Go to any project and you will see the PLI tab. This behaves exactly like our existing project / flag data views work.
-
Project Data View:
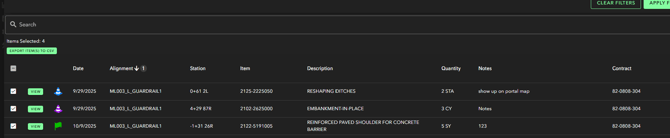
- One will have the ability to filter PLI by Org or User and Date Range
- You can also search for certain items in the "Search" bar
- PLI results can be resorted by the header values
- One or more items can be selected and exported to CSV File
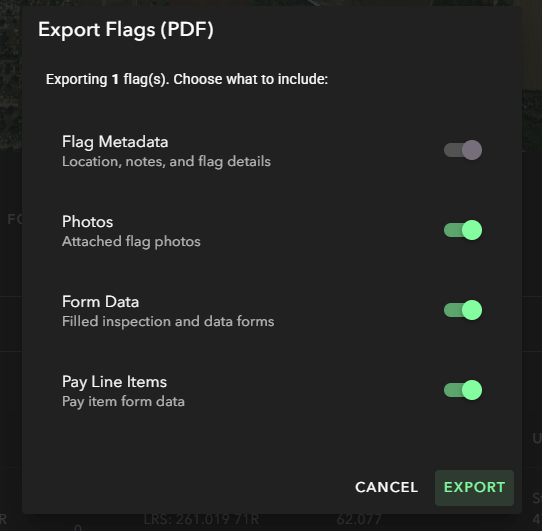
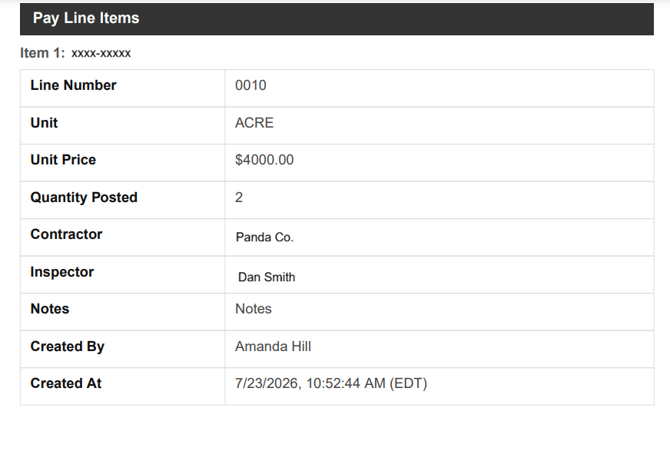
- PLI can also be included on a PDF flag export
- One will have the ability to filter PLI by Org or User and Date Range
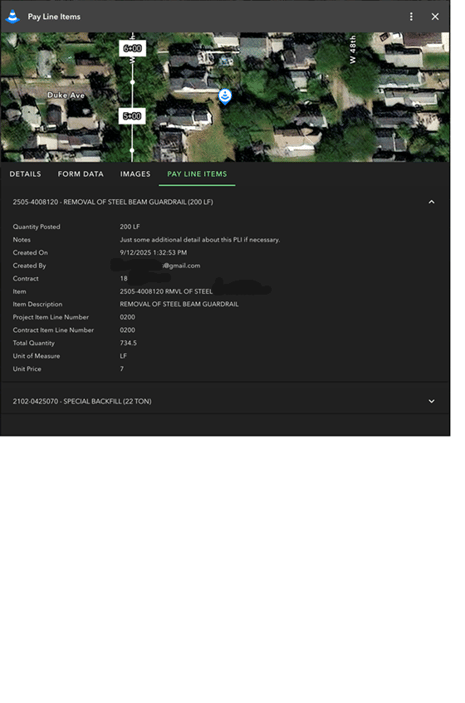
- Flag Data View

Need help? Call or text support at (216) 503-8554, or reach out online.